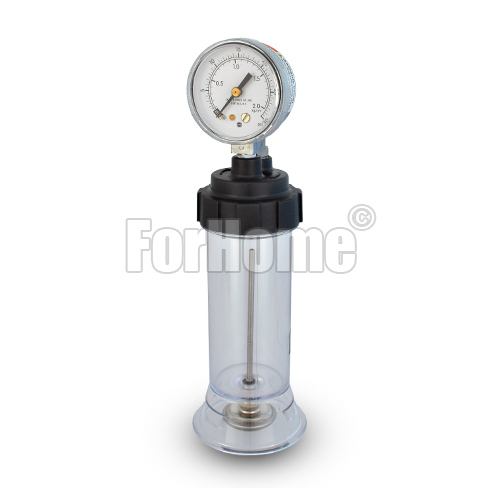
Carbonation test volume test Co2 quality
VOLUME TEST CARBONATION TEST
Note: to be used only with post-mix drinks.
1. Pre-cool the cup with ice or a cold product and then empty.
2. Immediately dispense a sample of the product to be tested into a cup larger than the test chamber.
Note: the cup must be kept close to the nozzle and tilted to reduce foaming.
3. Carefully transfer the sample into the test chamber until it is full.
4. Place the cap on the test chamber and close the screw.
5. Press the vent valve until zero appears on the indicator, then release.
6. Gently shake the tester until the indicator shows 5 PSIG. Relieve pressure again using the vent valve.
7. Shake the tester vigorously until the pressure stabilizes at the highest reading.
8. Read the temperature on the thermometer at the base of the tester. Then read the pressure indicated on the relative pressure gauge. The number at the intersection of the two temperature and pressure readings is the volume of CO2 in the sample. Measure the samples until the readings agree.
SETTING THE PRESSURE OF THE CARBONER
1. Take the carbonation value of the desired cup and add 1 volume to obtain the guideline value.
2. Divide the guideline value by the efficiency of the carbonator (usually 80%) to obtain the ideal value.
IDEAL VALUE = guideline value / 0.8
3. Read the column of the temperature header up to the one indicated on the thermometer. Cross the temperature line to the ideal value. Read the header of the pressure column above the ideal volume reading.
Note: the ideal carbonator pressure must be adjusted as necessary by measuring the actual values of the cup carbonator.
ADJUSTING THE FIELD OF THE THERMOMETER
1. Turn the nut under the thermometer about 1 turn counterclockwise using a 9/16 "wrench inserted through the slot in the base of the carbonation tester.
2. Remove the thermometer by pulling it away from the housing and turning it while holding the tester cup still.
3. Insert the thermometer shank into a container of ice water and mix vigorously for one minute. The thermometer should indicate 0 ° C (32 ° F).
4. If not, grasp the tips of the metal housing with pliers and turn the plastic face with one hand until 0 ° C is indicated.
5. With the stem still wet, insert the thermometer by pressing while turning.
6. Tighten the fixing nut 1 turn.
7. Check the thermometer by filling the test chamber with the mixture of water and ice and reading 0 ° C (32 ° F).
ADJUSTING THE GAUGE FIELD
1. The meter has been factory calibrated and will indicate on the zero scale when the tester is depressurized.
2. If the indicator does not indicate inside the zero scale when it is depressurized, unscrew the transparent plastic cover.
3. Carefully rotate the adjustment stem until the pointer is centered on the zero scale.
4. Replace the cover.
5. For absolute accuracy, gauge calibration should be performed with a calibrated test gauge.